9 Tips to Repair a Leaking Showerhead
A leaking showerhead is a routine plumbing maintenance task in residential bathrooms. Whether the drip comes from the connection point, the faceplate, or the spray holes, the fix typically involves cleaning, resealing, or replacing worn internal components. Knowing where the leak originates determines which repair approach applies.
The right method depends on the showerhead type, the severity of mineral buildup, and how long the fixture has been in service. An older brass showerhead may respond well to re-taping and new washers. A newer plastic unit may need a full cartridge or diverter replacement instead. Conditions vary by water hardness and usage frequency.
The tips below cover practical repairs for a leaking showerhead, including tools, materials, and step-by-step instructions for each situation. Adjustments are noted where fixture type or condition affects the process.
Tools and Materials
Tools
- Adjustable wrench or channel-lock pliers
- Flathead and Phillips screwdrivers
- Needle-nose pliers
- Stiff-bristle brush
- Utility knife
Materials
- Plumber’s tape (PTFE/thread seal tape)
- Replacement washers and O-rings (assorted kit)
- Pipe thread compound (optional)
- Commercial descaling solution (calcium and lime remover)
- Replacement showerhead cartridge or diverter (if needed)
Optional
- Zip-lock bag and rubber band (for soak method)
- Flashlight
- Penetrating oil (for corroded fittings)
How to Repair a Leaking Showerhead: 9 Practical Tips
A leaking showerhead can waste significant water over time and often signals worn seals, mineral buildup, or a failing internal component. The tips below address the causes in order of complexity, starting with the simplest fixes and moving toward more involved repairs.
Tip 1: Turn Off the Water Supply First
This applies to every showerhead repair, regardless of cause.
- Turn off the water at the main shutoff or the bathroom shutoff valve.
- Run the shower briefly to release pressure remaining in the line.
- Place a towel in the tub to protect the surface and catch small parts.
Do not skip the pressure release step — residual pressure can force components loose unexpectedly.
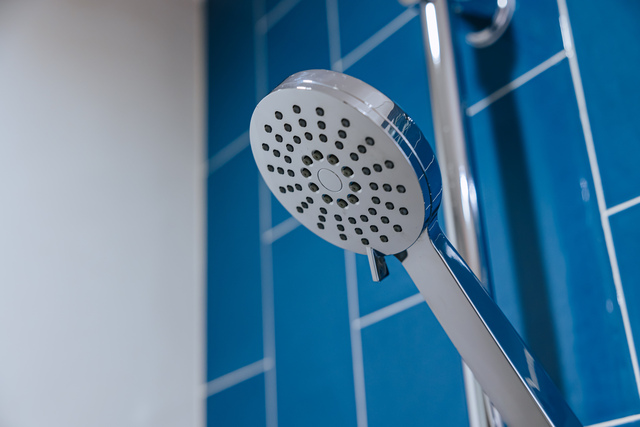
Tip 2: Check Where the Leak Is Coming From
Identifying the leak source prevents unnecessary disassembly.
- Turn the water on briefly and observe the showerhead closely.
- Note whether the drip comes from the connection point (where the arm meets the head), the faceplate, or individual spray holes.
- Leaks at the connection point typically indicate a failed thread seal. Leaks from the faceplate or nozzle holes usually point to internal washers or mineral blockage.
This step determines which tip below applies to your situation.
Tip 3: Re-Tape the Threaded Connection
Use this when the leak originates at the joint between the shower arm and the showerhead.
You will need: PTFE tape, adjustable wrench, clean rag
- Unscrew the showerhead by turning it counterclockwise. Use a wrench if hand-tight isn’t enough.
- Wrap the threads of the shower arm with a rag before using the wrench to avoid scratching the finish.
- Remove any old PTFE tape from the arm threads using a utility knife or your fingers.
- Wrap new PTFE tape around the threads 3–4 times in a clockwise direction (in the direction of thread pitch).
- Reattach the showerhead and hand-tighten first, then snug with the wrench. Typically a quarter turn past hand-tight is sufficient — do not overtighten.
- Restore water and check for dripping at the joint.
If the connection still weeps after re-taping, apply a thin layer of pipe thread compound over the tape before reassembling.
Tip 4: Replace the Rubber Washer or O-Ring
This applies when the leak originates inside the showerhead body, often visible as dripping from the faceplate when the water is off.
You will need: Replacement washer/O-ring kit, flathead screwdriver, needle-nose pliers
- Remove the showerhead from the arm.
- Look inside the showerhead inlet for a rubber washer seated in a groove. Use needle-nose pliers to remove it.
- Match the old washer to a replacement from an assorted kit. Size and thickness matter — bring the old washer to the hardware store if needed.
- Press the new washer firmly into the groove.
- Check for O-rings along the inlet threads and replace any that appear cracked, flattened, or misshapen.
- Reassemble and test.
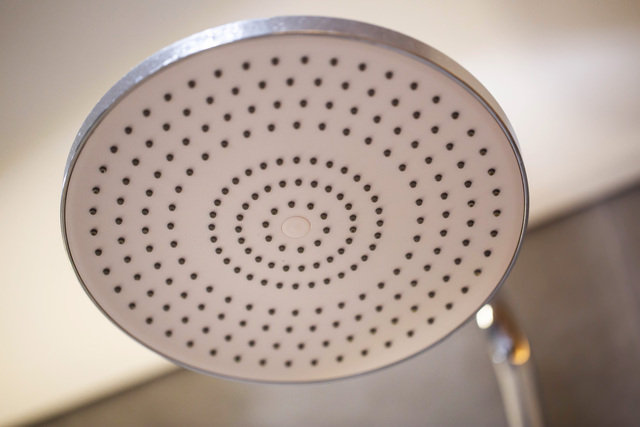
Tip 5: Remove Mineral Deposits from the Spray Nozzles
Hard water buildup can block individual nozzles and redirect water in ways that mimic a leak. This is a cleaning fix, not a seal repair.
You will need: Commercial descaling solution (calcium and lime remover), zip-lock bag, rubber band, stiff-bristle brush
- Fill a zip-lock bag with descaling solution diluted according to the product label.
- Submerge the showerhead faceplate in the bag and secure it with a rubber band around the shower arm.
- Soak for the time indicated on the product label — typically 30 minutes to a few hours depending on buildup severity.
- Remove the bag and scrub the nozzles with a stiff-bristle brush.
- Run the water on full pressure for 1–2 minutes to flush loosened debris.
Follow the descaling product’s safety instructions — some formulas require gloves and ventilation.
For showerheads with rubber nozzles, individual holes can often be cleared by pressing each nozzle with a fingertip.
Tip 6: Disassemble and Clean the Filter Screen
Many showerheads include a small mesh filter at the inlet. A clogged screen can cause backpressure that stresses seals and contributes to dripping.
You will need: Needle-nose pliers, stiff-bristle brush, descaling solution
- Remove the showerhead from the arm.
- Look inside the inlet opening for a small mesh screen or filter disc.
- Use needle-nose pliers to gently pull it out.
- Soak in diluted descaling solution for the time noted on the label, then scrub with a stiff-bristle brush.
- Rinse thoroughly and reinstall before reattaching the showerhead.
Tip 7: Inspect and Replace the Diverter Valve
This applies to combination tub/shower setups where the diverter controls water direction. A worn diverter can allow water to drip from the showerhead even when flow is directed to the tub spout, or vice versa.
You will need: Phillips screwdriver, replacement diverter cartridge, plumber’s grease
- Remove the diverter handle by unscrewing the set screw, typically located under a decorative cap.
- Pull the cartridge straight out using needle-nose pliers or by hand.
- Bring the old cartridge to a plumbing supply store to match the replacement — cartridges are brand- and model-specific.
- Apply a thin coat of plumber’s grease to the new cartridge before insertion.
- Press it firmly into place and reassemble the handle.
If the cartridge is corroded or will not pull free, apply penetrating oil and wait 10–15 minutes before retrying.
Tip 8: Tighten or Replace the Swivel Collar
On adjustable or handheld showerheads, the swivel collar or ball joint can wear out and leak at the connection point.
You will need: Adjustable wrench, replacement collar or O-ring
- Locate the swivel point on the showerhead.
- Try hand-tightening the collar. If it continues to leak, disassemble it.
- Look for a small O-ring inside the collar joint. Replace it if worn.
- If the collar housing itself is cracked or stripped, replace the full collar assembly or the showerhead unit.
Tip 9: Replace the Showerhead Entirely
When multiple seals have failed, the unit is heavily corroded, or the plastic housing is cracked, replacing the showerhead is the practical solution.
You will need: New showerhead, PTFE tape, adjustable wrench
- Remove the old showerhead as described in Tip 3.
- Clean the shower arm threads thoroughly before installing the new unit.
- Apply fresh PTFE tape to the arm threads before attaching the new head.
- Hand-tighten the new showerhead, then snug with a wrench. Avoid overtightening plastic fittings.
- Restore water and inspect all connection points for drips.
We hope you enjoyed these tips on how to repair a leaking showerhead. If you found it helpful, please share it on Facebook or Pinterest.