How to Repair a Leaky Washing Machine Hose in 8 Ways
A leaky washing machine hose can cause significant water damage behind household appliances. Depending on where the leak originates — the hose body, a fitting, or a connection point — the repair approach will differ. Catching it early limits damage to flooring and walls.
Not every hose leak requires full replacement. Some leaks stem from loose fittings or worn washers, which are straightforward to address with basic tools. Others involve cracks, bulges, or deterioration along the hose body, which typically call for replacement rather than patching.
The methods below cover eight practical ways to repair a leaky washing machine hose, from tightening connections to full hose replacement. Each section explains when the method applies and what steps are involved.
Tools and Materials
Tools
- Adjustable pliers or channel-lock pliers
- Flathead and Phillips screwdrivers
- Utility knife
- Bucket or towels
- Hose clamp driver or screwdriver
- Flashlight
Materials
- Replacement rubber washers (standard 3/4-inch, machine-compatible)
- Teflon (PTFE) thread tape
- Stainless steel hose clamps
- Replacement braided stainless steel washing machine hose
- Plumber’s epoxy putty
- Self-fusing silicone tape
- Leak-repair hose clamp patch kit
Optional
- Washing machine supply hose with built-in auto-shutoff
- Pipe thread sealant compound
Why Washing Machine Hoses Leak
Several conditions cause hose leaks, and the cause typically points to the right repair. Inspect the hose before starting any work.
Age and material degradation. Rubber hoses become brittle and crack over time, especially in rooms with temperature swings. Look for surface cracking, stiffness, or a flattened profile along the hose length.
Worn rubber washers. Washers inside the fittings flatten with use and lose their seal. If the leak appears as a drip at the connection point, a worn washer is a likely cause.
Loose fittings. Vibration from normal machine operation gradually loosens threaded fittings. This type of leak typically shows as minor seeping at the fitting rather than along the hose body.
Thread damage or corrosion. Corroded or cross-threaded fittings won’t seal properly even when tightened. Look for rust, pitting, or mineral deposits around the threads.
Kinking and pressure stress. Hoses positioned too close to the wall can kink, weakening the hose wall at the bend. Check for sharp bends or pinch points behind the machine.
Pinhole leaks. Small pinholes from abrasion or age show as a fine spray or wet spot along the hose body rather than at a connection. These are candidates for temporary patching, though replacement is the more reliable fix.
How to Repair a Leaky Washing Machine Hose: 8 Methods
Identify where the leak is coming from before beginning any repair. The methods below address specific failure points — connection leaks, hose body damage, and full hose deterioration. Choosing the right method depends on the location and severity of the leak.
Before starting any repair: disconnect the washing machine from power and shut off the water supply valves at the wall.
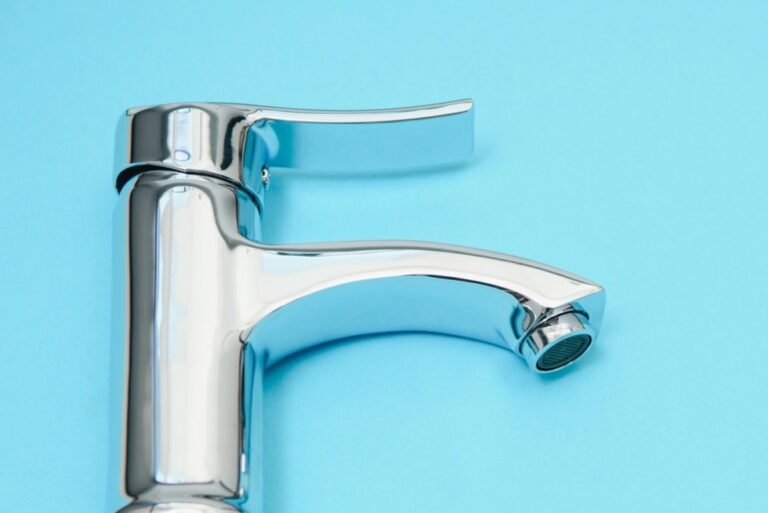
1. Tighten a Loose Fitting to Repair a Washing Machine Hose
This applies when the leak comes from the threaded connection at the supply valve or the back of the machine. The hose may have loosened from vibration over time.
You will need: Adjustable pliers, towels
- Turn off both hot and cold water supply valves.
- Use adjustable pliers to turn the hose fitting clockwise with firm, steady pressure.
- Restore water supply briefly and check for dripping.
- If the leak stops, no further action is needed.
If the fitting won’t tighten further or the leak continues, the washer inside the fitting is likely worn. Move to Method 2.
2. Repair a Washing Machine Hose by Replacing the Washer
Worn or flattened rubber washers are a frequent cause of drips at connection points. This is typically one of the first repairs to attempt on a hose that leaks at the fitting end.
You will need: Adjustable pliers, flathead screwdriver, replacement 3/4-inch rubber washer
- Shut off water supply valves and disconnect the leaking end of the hose.
- Look inside the hose fitting for the small rubber washer.
- Pry out the old washer with a flathead screwdriver.
- Press the new washer firmly into the fitting recess.
- Reconnect the hose and hand-tighten, then snug with pliers — one-quarter to one-half turn past hand-tight.
- Restore water supply and check the connection.
3. Repair a Washing Machine Hose Threads with Teflon Tape
This method addresses slow seeping leaks at threaded fittings where the threads are not sealing properly. It works on metal-to-metal threaded connections.
You will need: Teflon (PTFE) tape, adjustable pliers
- Shut off water and disconnect the hose from the leaking fitting.
- Wrap PTFE tape clockwise around the male threads, overlapping by roughly half the tape width. Apply two to three layers.
- Reconnect the hose and tighten firmly with pliers.
- Restore water supply and observe the fitting for seeping.
Teflon tape is not a substitute for a damaged washer. Use both methods together if the fitting has both threaded and washer connections.
4. Repair a Washing Machine Hose Clamp
Some washing machines use clamp-style connections at the drain hose or internally at the pump. A loose or corroded clamp can allow leaking where the hose meets the housing.
You will need: Screwdriver or hose clamp driver, replacement stainless steel clamp if needed
- Locate the clamp at the connection point. Move the machine forward if needed for access.
- Tighten the clamp screw until snug. Avoid overtightening, which can cut into the hose material.
- If the clamp is corroded or stripped, remove it and install a new stainless steel clamp of the same diameter.
- Restore water and check the connection.
5. Repair a Washing Machine Hose Pinhole with Silicone Tape
Self-fusing silicone tape can temporarily seal a small pinhole leak along the hose body. This is a short-term fix only — plan to replace the hose within a few days of applying this repair.
You will need: Self-fusing silicone tape, clean dry cloth
- Dry the hose surface completely around the leak area.
- Stretch the silicone tape to roughly double its length as you wrap.
- Overlap each layer by at least half the tape width.
- Extend the wrap two to three inches past each side of the leak.
- Press the tape end firmly to fuse it to the layer below.
6. Repair a Washing Machine Hose Crack with Epoxy Putty
Epoxy putty can seal a minor surface crack at a hose joint or fitting. Like silicone tape, this is a temporary measure and not a permanent repair.
You will need: Plumber’s epoxy putty, gloves, clean dry cloth
- Dry the area completely and allow it to sit until no moisture remains.
- Cut or knead off a portion of epoxy putty per the manufacturer’s instructions.
- Mix the two-part putty until the color is uniform throughout.
- Press the putty firmly over the crack, smoothing the edges flat.
- Allow full cure time before restoring water — typically 20–60 minutes depending on the product.
Do not use epoxy putty on a hose showing bulging, cracking along its length, or brittleness. Replace the hose instead.
7. Repair a Washing Machine Hose with a Clamp Patch Kit
Clamp patch kits are a more mechanical temporary fix for small leaks along the hose body. They consist of a rubber patch and a metal clamp that applies compression directly over the leak point.
You will need: Hose clamp patch kit sized for 3/4-inch washing machine hose, screwdriver
- Shut off water supply and drain residual water from the hose.
- Dry the leak area thoroughly.
- Center the rubber patch directly over the leak point.
- Position the metal clamp over the patch.
- Tighten the clamp bolts evenly, alternating sides to apply uniform pressure.
- Restore water supply and monitor for 10–15 minutes.
8. Repair a Washing Machine Hose by Full Replacement
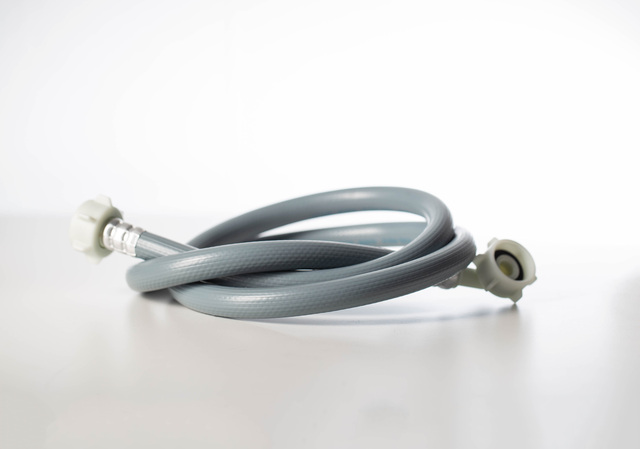
Full replacement applies when the hose is cracked, bulging, brittle, kinked, or more than five years old. Braided stainless steel hoses are more resistant to bursting than standard rubber and are worth considering as a direct replacement.
You will need: Replacement hose, adjustable pliers, bucket, towels
- Shut off hot and cold water supply valves at the wall.
- Pull the washing machine forward to access both connections.
- Place a bucket under the hose ends to catch residual water.
- Unscrew the old hose from both the wall valve and the machine inlet, using pliers if needed.
- Inspect the inlet fitting threads on the machine for damage or corrosion.
- Install new rubber washers in both ends of the new hose if not pre-installed.
- Hand-tighten the new hose onto both connections, then snug with pliers.
- Restore water supply slowly and check both ends for dripping before pushing the machine back into position.
How to Maintain Washing Machine Hoses
Routine inspection and timely replacement reduce the likelihood of leaks significantly.
Inspect hoses every six months. Check for surface cracking, bulging near the fittings, stiffness along the hose body, and moisture or mineral deposits at connection points.
Replace rubber hoses proactively. Standard rubber hoses typically have a service life of three to five years, depending on water pressure and usage. Replacing them before visible failure is more reliable than waiting for a leak.
Upgrade to braided stainless steel. These hoses are more resistant to bursting and abrasion than rubber and fit standard 3/4-inch connections. The cost difference is modest relative to the potential cost of water damage.
Leave adequate clearance behind the machine. The recommended clearance between the machine and the wall is typically four inches or more. Less space forces hoses into sharp bends that weaken the hose wall over time.
Exercise the supply valves periodically. Valves that are rarely turned can seize or corrode. Turning them off and on once or twice a year helps maintain their function and makes it easier to shut off water quickly if a hose fails.