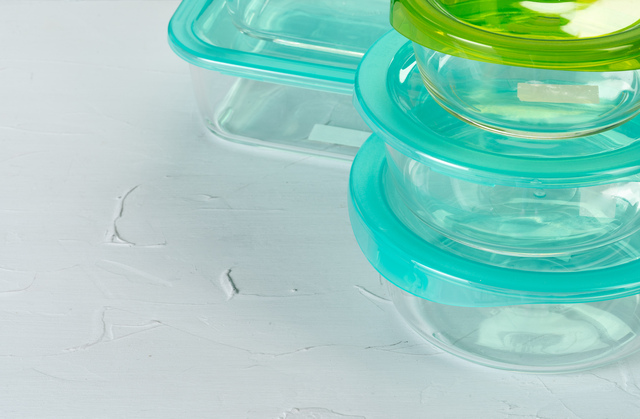
7 Ways to Clean Plastic Storage Bins
Plastic storage bins are workhorses. They hold everything from garage supplies to pantry overflow, and they take a beating for it. Over time, dust, residue, and lingering odors build up inside — and a quick rinse usually isn’t enough to get them truly clean.
The good news is that cleaning plastic storage bins doesn’t require specialized equipment or a lot of time. Most methods use products you likely already have on hand. The key is matching the right approach to the type of buildup you’re dealing with.
Whether you’re tackling light dust or stubborn mildew, here’s how to clean plastic storage bins and keep them in good shape between uses.
7 Ways to Clean Plastic Storage Bins
Plastic storage bins can go from a quick wipe-down to a full deep clean depending on what’s been stored inside and for how long. Cleaning plastic storage bins effectively means reading the situation — a bin that held craft supplies needs a different approach than one that sat damp in the garage all winter.
These seven methods cover everything from everyday washing to odor removal and outdoor rinsing, so you can tackle whatever condition your bins are in.
Cleaning Plastic Storage Bins with Dish Soap
For bins that just need a routine refresh, dish soap and warm water is the most straightforward place to start. Dish soap lifts oils and light grime from nonporous surfaces, which makes it a reliable option for most rigid plastic bins.
Fill the bin with warm water and add a few drops of dish soap. Scrub the interior walls, bottom, and lid with a soft-bristle brush or sponge — getting into the corners where residue tends to collect. Skip steel wool or abrasive scrubbers, as these can scratch the plastic and create small grooves that trap bacteria over time.
Rinse thoroughly and let the bin air dry completely before replacing the lid. Soap film left behind can transfer to fabric, paper, or other stored contents.
Using All-Purpose Cleaner on Dirty Plastic Bins
When a bin has seen more than just light dust — think dried-on residue from cardboard packaging or general household grime — an all-purpose cleaner can cut through buildup faster than soap alone. These cleaners contain surfactants and mild solvents that work into dried debris without needing a long soak.
Spray the interior generously and let it sit for two to three minutes before wiping down with a microfiber cloth. For bins with textured or ribbed surfaces, a soft brush helps work the cleaner into the grooves. Microfiber tends to trap loosened debris better than paper towels, which can leave lint behind.
One thing worth checking: some all-purpose cleaners contain mild bleaching agents that can fade printed labels or alter the color of certain bins with repeated use. A quick label scan before you spray can save you from a surprise.
Also Read: How to Clean Plastic Storage Containers With Hydrogen Peroxide
How to Remove Mold from Plastic Storage Bins
Bins stored in basements, garages, or other humid spaces can develop mold or mildew — especially if they were sealed while still damp. A diluted bleach solution is one of the more reliable options for surface mold on non-porous plastic.
Mix one tablespoon of bleach with one quart of water and apply it to the affected area with a sponge or spray bottle. Let it sit for five to ten minutes before scrubbing and rinsing. Avoid using bleach on bins with metal latches or hinges unless you know the hardware is rust-resistant — bleach speeds up corrosion on uncoated metal parts.
Rinse the bin thoroughly after treatment. Bleach residue left on the surface can degrade certain plastics over time, particularly thinner materials.
Getting Rid of Odors in Plastic Storage Bins
Some odors just don’t respond to soap and water — and that’s where enzyme cleaners come in. These products are formulated to break down organic matter at a molecular level, tackling food residue, biological odors, and buildup that general surface cleaners tend to leave behind. They’re particularly useful for cleaning plastic storage bins that held food packaging, garden supplies, or anything with a persistent smell.
Apply the enzyme cleaner to the interior and let it dwell for the time specified on the label — typically 10 to 30 minutes. That dwell time matters. It’s what gives the enzymes enough contact time to break down odor-causing compounds rather than simply masking them.
Keep in mind that enzyme cleaners tend to be less effective in cold temperatures. If your bins are stored in a chilly garage or basement, bring them inside to a warmer space before applying the cleaner for better results.
Removing Stains and Scuff Marks from Plastic Bins
For scuff marks, crayon, or surface staining that soap can’t touch, melamine foam — better known as Magic Eraser — is worth reaching for. It works as a micro-abrasive, physically lifting the top layer of contamination from the plastic surface rather than dissolving it.
Dampen the foam pad and rub it over the stained area using light, even pressure. It tends to perform well on smooth plastic surfaces, though it can leave a slightly dulled finish on high-gloss bins if you press too hard or scrub too aggressively.
This method works well as a spot treatment for exterior marks rather than an all-over scrub. Reserve it for targeted stains to get the most out of each pad and avoid unnecessary wear on the plastic.
How to Remove Sticky Residue from Plastic Bins
Label adhesive, tape residue, and sticky buildup from stored products can be surprisingly stubborn on plastic. Rubbing alcohol at 70% or 91% concentration breaks down adhesive compounds effectively and evaporates without leaving a film behind.
Apply a small amount to a cotton pad or cloth and rub the affected area with steady pressure, working from the outer edges of the residue inward. This keeps the adhesive from spreading as it loosens. Most residue lifts within a minute or two with consistent rubbing.
Before applying alcohol to a labeled or decorative bin, test it on a hidden spot first. Alcohol can strip certain inks and surface coatings. It’s generally safe for polypropylene (PP) and high-density polyethylene (HDPE) — the two most common plastics used in storage bins — but it’s worth a quick check on anything with printed graphics.
Using Hydrogen Peroxide to Disinfect Plastic Storage Bins
Hydrogen peroxide is a solid option when a bin needs more than just a surface clean. It works as a mild disinfectant, breaking down bacteria and light staining on plastic without the harshness of bleach. It’s particularly useful for cleaning plastic storage bins that held food packaging, kitchen supplies, or anything where hygiene matters.
Standard 3% hydrogen peroxide — the kind sold in most drugstores — is strong enough for household bin cleaning without risking damage to the plastic. Pour it directly into the bin or apply it with a spray bottle, making sure to coat the interior walls and bottom evenly. Let it sit for five to ten minutes before wiping down with a clean cloth.
Rinse the bin thoroughly after treatment and allow it to air dry completely before closing the lid. Hydrogen peroxide breaks down into water and oxygen over time, so it doesn’t leave a harmful residue — but a full rinse ensures no moisture gets sealed inside.
Also Read: How to Clean Plastic Storage Containers With Hydrogen Peroxide
Tips for Keeping Plastic Storage Bins Clean Between Washes
Staying ahead of buildup is easier than dealing with it after the fact. A few small habits can go a long way toward keeping plastic storage bins cleaner between deep washes — without adding much to your routine.
Use a Liner to Keep Bins Cleaner
Lining a bin with a plastic bag, cloth insert, or disposable liner before adding contents keeps residue off the bin itself. It’s a simple step that makes a real difference for bins used in pantries, under sinks, or anywhere items tend to shed dust or debris. When the liner gets dirty, you swap it out rather than scrubbing the whole bin.
Always Dry Plastic Bins Before Closing
Closing a bin while it’s still damp — even slightly — is one of the most common reasons mildew develops inside. After washing or storing anything that introduced moisture, leave the lid off for a few hours to let air circulate before sealing it back up.
How to Store Bins in Humid Spaces
Basements and garages tend to hold more moisture than the rest of the house, especially in warmer months. Storing bins with the lid slightly cracked allows air to move through and reduces condensation on interior walls. It’s a small adjustment that can prevent a bigger cleaning job later.
Reducing Moisture Buildup Inside Storage Bins
For bins used in long-term storage — particularly in humid or poorly ventilated spaces — a small moisture-absorbing packet placed inside can help reduce the conditions that lead to odor and mildew. Replace the packets seasonally or when they feel full to keep them working effectively.