How to Remove Debris From Outdoor AC Unit
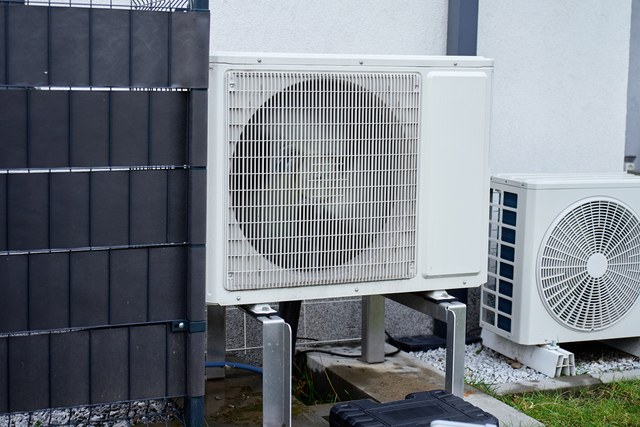
Outdoor air conditioning condensers tend to collect dirt and debris during regular use. This buildup restricts airflow through the unit’s fins and coils, which can reduce cooling efficiency and increase energy consumption. Regular cleaning helps maintain proper airflow and may extend the lifespan of the equipment.
The cleaning process varies depending on the type and amount of debris present. Light surface debris typically requires only basic hand removal and rinsing, while compacted dirt or organic material may need more thorough cleaning with a coil brush or fin comb. The condition of the fins also affects the approach, since bent or damaged fins require careful handling to avoid further distortion.
The steps below cover debris removal for typical residential condensers, including surface cleaning, fin inspection, and basic preventive measures. The methods outlined work for most standard units, though older models or units with significant fin damage may benefit from professional service.
Tools and Materials
Tools:
- Garden hose with spray nozzle
- Screwdriver (for removing grille or top panel)
- Soft-bristle brush or coil brush
- Fin comb (optional, for straightened bent fins)
- Shop vacuum with brush attachment (optional)
- Work gloves
Materials:
- Coil cleaner (optional, for heavy buildup)
- Drop cloth or tarp (optional, to catch debris)
Removing Surface Debris and Preparing the Unit
Before cleaning the coils or fins, remove loose debris from the exterior and top of the condenser. This prevents additional material from entering the unit during the cleaning process.
You will need: Work gloves, screwdriver, shop vacuum or soft-bristle brush
- Turn off power to the unit at the outdoor disconnect switch or circuit breaker. Do not skip this step—the fan and electrical components pose serious shock and injury risks.
- Remove the top grille or fan guard by unscrewing the fasteners. Set the grille and screws aside on a clean surface.
- Lift out any large debris by hand, including leaves, twigs, and grass clumps. Wear gloves to avoid cuts from sharp edges.
- Use a shop vacuum with a brush attachment to remove loose dirt and smaller debris from the top and around the fan motor housing.
- Brush away debris from the exterior cabinet using a soft-bristle brush, working from top to bottom.
If the fan blade is coated with dirt or grime, wipe it carefully with a damp cloth. Avoid bending the blades or disturbing the motor assembly.
Cleaning the Condenser Fins and Coils
The condenser fins surround the unit and house the coils where heat exchange occurs. Debris lodged between the fins blocks airflow and reduces cooling capacity. Cleaning these components typically improves performance, though results depend on the severity of the buildup.
You will need: Garden hose with spray nozzle, coil brush, coil cleaner (if needed)
- Inspect the fins for visible dirt, grass clippings, or matted debris. Look for areas where material has compacted between the thin metal blades.
- Spray the fins from the inside of the unit outward using a garden hose set to a gentle stream. Avoid using high pressure, which can bend the delicate aluminum fins.
- Work around the entire perimeter of the unit, rinse sections just enough to loosen debris.
- For stubborn buildup, apply a coil cleaner according to the manufacturer’s instructions. Most formulas require spraying onto dry fins, allowing the product to sit for several minutes, then rinsing thoroughly.
- Use a coil brush to gently scrub areas with heavy dirt or organic matter. Brush in the direction of the fins, not across them, to avoid bending.
If water pressure alone does not remove compacted debris, repeat the rinsing process or apply a second round of coil cleaner. Do not use a pressure washer, as the force can permanently damage the fins.
Straightening Bent Fins
Bent fins reduce airflow and cooling efficiency. A fin comb can restore alignment, though this tool requires careful use to avoid creating additional damage.
You will need: Fin comb with appropriate spacing (typically 14–16 fins per inch for residential units)
- Identify sections where fins are visibly bent, flattened, or crimped.
- Select the fin comb blade that matches the spacing of your unit’s fins. The comb teeth should slide smoothly between unbent sections.
- Insert the comb into an undamaged area and gently pull it through the bent section in a straight, steady motion.
- Repeat as needed, working slowly to avoid tearing the thin metal. If resistance is strong, stop and assess whether the fins are too damaged for DIY correction.
Severely crushed or corroded fins may not straighten fully. In these cases, the fin comb can still improve airflow in less-damaged sections.
Reassembling and Testing the Unit
Once the fins and interior are clean, reassemble the condenser and restore power. A visual check confirms that debris removal was effective and that the unit is ready for operation.
You will need: Screwdriver, removed grille and fasteners
- Replace the top grille or fan guard, aligning it with the mounting holes.
- Secure all fasteners, ensuring the grille sits flush against the cabinet.
- Remove any tools, cleaning materials, or loose debris from the area around the unit.
- Restore power at the disconnect switch or circuit breaker.
- Set the thermostat to cooling mode and observe the condenser. The fan should spin freely without unusual noise or vibration.
If the fan does not start, the unit makes grinding or rattling sounds, or airflow seems restricted, turn off power and inspect for overlooked debris or damaged components. These symptoms may indicate a problem beyond routine cleaning.
We hope you enjoyed this guide on how to remove debris from outdoor AC unit. If you found it helpful, please share it on Facebook or Pinterest.